Life..a miracle

Life..a miracle

Sunday, November 13, 2011

Steaming goodness..rava idli!

Yikes, I really got late on this one! We all know and love South-Indian cuisine. The light fluffy idlis, crispy dosas and the spicy & tangy sambar..umm just makes your taste buds crave. I of course crave these delicacies once in a while and then try to recreate them in my small homely kitchen. A fortnight back, I was trying to recreate the ever-so known and loved rava idli. I researched around to find out what others have done to create light rava idlis as I was not very keen on using baking soda. So finally after reading up on a few of the recipes I created this one..they turned out really good! When I made these I didn't have all the usual ingredients for a green coconut chutney, so I made one with red chillies and it was surely yummy!


Rava idli with red chili coconut chutney

For the idli:
Ingredients:
1.5 cups rava
3/4 - 1 cup yogurt
3/4 cup grated carrots
8-10 cashews broken
2 tbsp chana dal
6-8 curry leaves light crushed
1.5 tsp mustard seeds
1-2 red chillies cut into small pieces
salt to taste
1 tbsp oil

For the chutney:
3/4 cup freshly grated coconut or frozen grated coconut
4-5 red chillies
2-3 cloves of garlic
1 inch piece ginger
1-2 tbsp lemon juice
1 tsp mustard seeds
2-3 curry leaves
1 tsp oil
water to adjust consistency
salt to taste

For the idli:
  • Add oil to a heated pan, add mustard seeds and when they splutter add chana dal, cashews, red chilies  and curry leaves. Saute for a min and add the rava. Roast the rava until it changes colour slightly and smells good. Season with salt and take it off the stove.
  • Keep the idli plates greased and ready. Transfer the rava mixture in a wide bowl and mix in the carrots. Add the beaten curd to the rava mixture, add little water so that the mixture is of idli batter consistency. Pour the batter in the idli plates immediately and steam. If you dont have the conventional idli stand then you can make them in small bowls and place them in a steamer. The tip that I got is that once the curd is added, the batter must be steamed right away. In about 7-8 minutes delicious rava idlis are ready. Makes about 20-25 idlis.
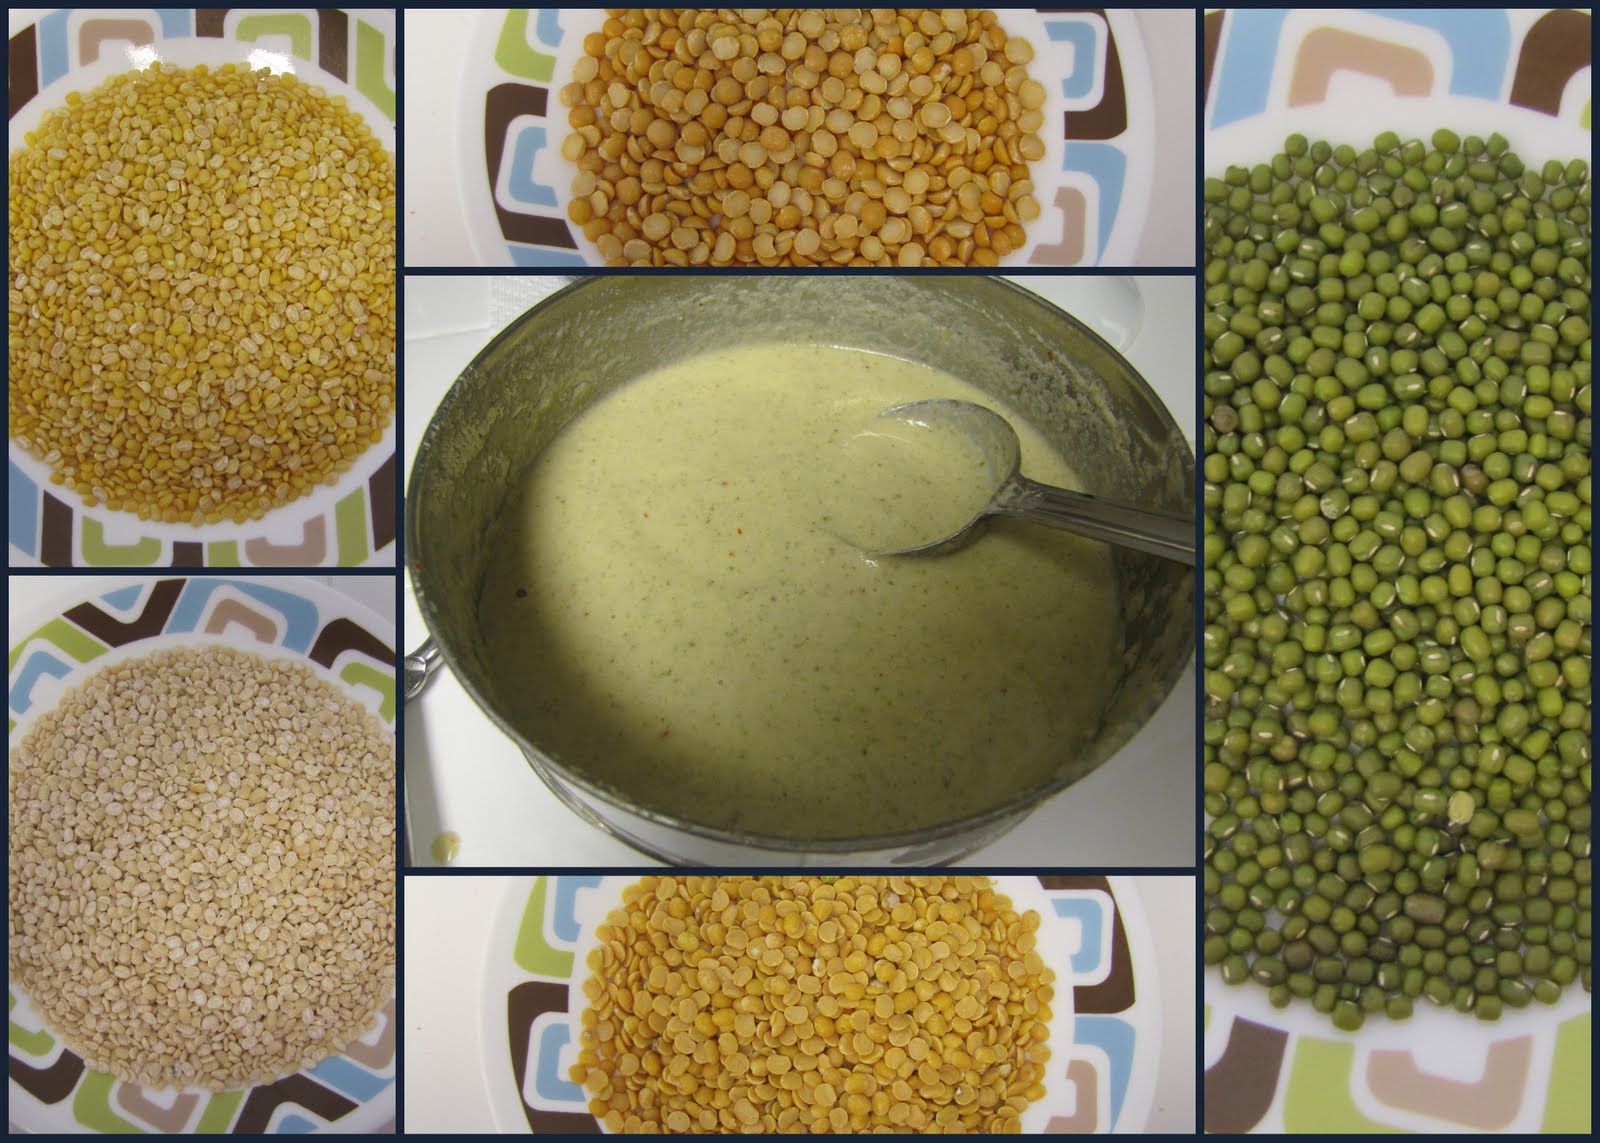
For the chutney:
  • Grind together the coconut, chilies, ginger and garlic with some water into a smooth texture. Once you get the desired texture, add salt to taste and transfer into a bowl.
  • Now for the tadka, heat oil in a sauce pan and add mustard seeds, curry leaves and red chilies. Once they splutter, pour it into the chutney mixture in the bowl. Mix well and add lemon juice. Adjust the salt and mix well. The chutney is now ready! Enjoy with steaming idlis!

Wednesday, November 9, 2011

Cheer me up cookies!

The past week has been a real rough one for us. But as the week progressed things have got better and we feel life is coming back on track. I am serious when I say baking is really therapeutic for me. I was craving to bake and I knew that my fiance was craving something sweet to get over all the strong meds he is on. So when I asked him that should I bake some cookies for him, he gave me a big nod and I was almost jumping! I made these cookies mid-week but got around to writing the post today. Better late than never.

I had bought a Nutella jar last week in the notion of baking over the weekend and finally got the chance to have fun with it. I have a bunch of things in mind to try out but I decided to make simple Nutella cookies inspired by this recipe posted by Tasty Kitchen.

I am not new to Nutella and of course I love it! I haven't had it for a while and surely I had forgotten what I was missing. These cookies were just what I needed.. the rich flavor of the nutella contrasts perfectly with white chocolate and of course hazelnuts accentuate the flavor even further.


White chocolate & hazelnut Nutella cookies

Ingredients:
1 cup whole wheat flour
1/2 cup nutella
1/3 cup sugar
1 egg
1/3 cup chopped hazelnuts and white chocolate
  • Preheat oven to 350°F and arrange a baking sheet with parchment paper.
  • Beat the egg and mix in the sugar. Add in the flour followed and mix well.
  • Add nutella and mix. The batter will become crumbly, knead it a little bit and start making 1 inch balls.
  • You can add in the chopped nuts and chocolate into the batter and bring it together or flatten each balls using a flat base glass and press in some hazelnut and white chocolate.
  • Bake for 8-9 mins or until the cookies firm up. Cool them on a rack and like I did serve some right off the sheet! Enjoy!
Do try these healthy cookies..yes healthy. I managed to make them with whole wheat and no butter. The fat content from Nutella was enough to get a crunchy cookie with a chewy inside. The cookies were ready in less than hour..and are truly hard to resist. 

Note: I had pressed in the pieces of nuts and chocolate after the flattening the cookie and then turned the cookie over..magic happened! The chocolate chunks got caramelized and have added a lovely chewy flavor to the cookie. :) See the overturned cookies below..yummy yum yum!!!

Saturday, November 5, 2011

Shortbreads that almost fell short on execution..

It usually happens that when you expected something to go your way..everything just goes against it. I am not a big planner unless needed and today's weekend was supposed to be a elaborately planned one. I had a spotless plan in place and was excited about it but with an early morning urgent care visit I knew I had to bottle my enthusiasm and get through the day.
Now back to the original topic of making shortbreads. This of course isn't my first time making shortbreads but this time it was an experiment for me to see if there adhere to the shapes I was trying to give them and gladly they did. We were supposed to attend a family dinner for Diwali today and I had been thinking of something to make with a Diwali theme, excluding the usual sweets that we make. I finally came up with an idea of making shortbreads shaped like a diya (an oil lamp made of clay) and to decorate them. They did come out pretty well, in fact almost perfect in the first try.. only if my oven was fair and heated uniformly throughout.. sigh! :|
So here is my take on shortbread cookies for Diwali:


Shortbread cookies:

  • Use the basic recipe of making a shortbread cookie. I followed the one from Joy of Baking which can be found here
  • I used a medium sized round cookie cutter to get the bases for diya, and cut out the shape of a flame using a paring knife. Mend in each half of the round with one flame and make sure it is evenly thick, else they will bake unevenly. 
  • Once baked and cooled, dip the bases in melted chocolate and then outlined them with some sprinkles. Finally place the cookies in the refrigerator until the chocolate hardens and then store in a air-tight container. 


These were going to be gifts for each family and hence I packed a set in small treat bags. I was hoping to have more intricate decorations but as I said problems dont announce themselves..they just arrive..We were not able to attend the dinner but I hope these reached their final destinations in an intact state and also hope that everyone liked them. My fiance of course enjoyed having them and that just made my day. :)

Saturday, October 29, 2011

Diwali! The festival of lights!

The biggest festival has come by and already past us.. :( This time I have to completely blame my work for making me miss out on it.. I had made elaborate plans for Diwali.. I was planning to make rangoli (colorful design patterns) everyday! But instead I had to work to my day's end! Anyhow I of course tried to do my bit for Diwali and this post is going to just document that!

First of all, I have to tell you all, how great my fiance is! All my plans started falling apart on the main day of Diwali..but my sweetheart took the initiative did all the shopping,decoration and also the actual puja for Goddess Laxmi. Look how pretty.. :)


Diwali means making yummy treats- both savory and sweet and sharing them with your loved ones. I of course had to make something on a healthier side..and I have found that there isn't really any thing that falls under that category. Nevertheless I decided to make my favorite savory treat - Chivda and a sweet which was originally called Dilpasand burfi.

Masala chivda
Chivda is a crispy snack made from puffed rice. It has a lot of variations and of course I had to make my favorite variation.

Ingredients:
For the masala:
1 tbsp asafoetida seeds
1 tsp coriander seeds
1 tsp cumin seeds
1 tsp black peppercorns
1 tsp turmeric powder
1 tsp amchur powder
2 tsp red chili powder

  • Mix all the ingredients and grind them to a fine powder. You can vary the amounts as per your liking. 
For the chivda:
2-3 tbsps chivda masala
4 cups thin puffed rice (thin/medium poha) - I lightly roasted them to get them crispy.
10-12 curry leaves
1/3 cup peanuts
1/3 cup cashews
6-8 green chilies cut into small pieces
1/3 cup sliced dried coconut
1 tbsp mustard seeds
2 tbsp turmeric powder
oil as needed
salt and sugar to taste

  • Mix masala, sugar and salt. Keep it aside.
  • Shallow fry the peanuts, cashews,coconut and curry leaves in oil and keep them aside. Crush the curry leaves lightly.
  • Heat oil in a deep vessel. Once heated add mustard seeds and let them crackle. Add the chillies and let them get crisp in the oil. Now add turmeric powder followed by the masala.
  • Once the masala separates itself from the oil, add the puffed rice and mix well and let it stay on medium heat to come together and keep mixing it frequently but delicately. Be careful to not break the puffed rice.
  • After the mixture has come together add the peanuts,cashews,etc mixture to it. Mix everything well and let it get roasted for a few more mins. Check the taste and adjust the spices,salt and sugar. Let it cool down and store in a air-tight container. The chivda is ready to enjoy!

Sorry for the poor picture quality but this chivda was over before I could get any more pics. :( But that's not really a bad news..is it!

I had different plans for the sweets, but of course nothing really goes as planned. So without wasting too much time, I decided to pick a recipe and make it. I chose the well know Tarla Dalal recipe for Dilpasand burfi.

Anjeer-badam-kaju Burfi


Here is the original recipe, I didn't have any pistachios at home and decided to substitute it with almonds. But to my despair, it didn't turn out as well as it should have. :( The flavor was definitely up-to-par. The cashew burfi and badam burfi weren't reduced to the right level and ended up having excess moisture. Due to this I couldn't really roll them as desired. If you get into a similar trouble, then refrigerate the individual burfis for a few hours and then roll them together. I was in a hurry since it was almost 1am and I had an early workday to begin and so in a hurry I just rolled them together, due to this the cashew and almond burfi got meshed in together. Anyways hopefully next time I will be more careful. Nonetheless everyone loved them!


Monday, October 10, 2011

Healthy streusel cupcakes

I guess before I begin I have to mention this.. Yes, I have been baking almost weekly now..and no I dont gobble everything.. in fact this time I have made enough to share.. ;)
Baking has surely become my stress buster.. at the end of a grueling week, my mind starts wandering around to find something yummy to bake! Last friday, I found just about the right thing to make!

After baking for the past few months, I felt pretty confident to experiment and found out that Abby Dodge had posted the October #baketogether challenge. I have been trying to participate in this monthly event for past few months and finally this month I got the perfect recipe.


I love coffee cakes! I am a coffee person and everything that goes well with coffee becomes my favorite too. I love the streusel and I dont spare even a tiny crumb of it. But this cake was going to be something else. I was dying to make a healthy version especially since I am trying to cut down big time! I love the fact that Abby encourages everyone to create their own version and instead of making a cake I preferred to make cupcakes and so here goes:

Streusel cupcakes

For the streusel:
1/2 cup dark brown sugar
1/3 cup all purpose flour
1/3 cup oats
1/4 cup walnuts
1 1/2 teaspoons ground cinnamon
3 tbsp unsalted butter, melted and cooled

For the cake:
1 cups all purpose flour
1 cup whole wheat flour
1 1/2 teaspoon baking soda
3/4 teaspoon ground cinnamon
1/2 teaspoon freshly grated nutmeg
1/2 teaspoon table salt
6 tablespoons olive oil
1 1/4 cup light brown sugar (I used less than a cup and add about 2 tbsp honey)
1.5 teaspoon pure vanilla extract
1 large egg & 1 egg white at room temperature
1 cup yogurt, at room temperature
  • To make the streusel: In a small bowl, combine the brown sugar, flour and cinnamon. Drizzle over the melted butter and, using a fork (or use your fingers), mix the ingredients are well blended and form small crumbs. Pop in the fridge while you make the batter.
  • To make the cake: Position an oven rack in the center of the oven. Heat oven to 350°F. Lightly grease and flour the sides and bottom of a 9 x 2-inch square baking pan or a cupcake pan.
  • In a medium bowl, combine the flour, baking soda, cinnamon, nutmeg, salt and cloves. Whisk until well blended. In a large bowl, beat together the oil, sugar and vanilla until well blended, about 3 minutes. Add the eggs, one at a time, beating well after each addition. Add about half of the flour mixture and mix just until blended. Add the yogurt and continue mixing just until blended. Using a rubber spatula, fold in the remaining flour mixture.
  • Spoon about a tablespoon of the batter into each of the prepared molds and spread evenly. Evenly scatter half of the streusel mixture over the batter. Spoon the remaining batter evenly over the streusel and spread evenly. Scatter the remaining streusel evenly over the top.
  • Bake until the top is browned and a pick inserted in the center of the cupcake comes out clean, 25 to 30 minutes. Cool on a wire rack until warm or room temperature.

I was so anxious that the moment I got them out I had a bite..and got discouraged. :( The sugar in the cupcakes has not settled. The cupcakes looked so pretty, I was feeling really sad. But today when I tried one again, it tasted almost perfect. I know a little more sugar would do, but today I didn't really miss it. The streusel had just the right amount of sweetness and balanced the whole flavor well.
These will be perfect for breakfast, lunch or even as a snack! Enjoy!

Friday, October 7, 2011

A sweet treat for a sweet return

Time is truly flying by..Just when I thought it was still September we have already entered the next month. My work has been taking most of time and it has turned out to be a favorable distraction especially since the better half was away for the past week. But with his return I of course had a reason to celebrate and but of course it had to be something that was healthy yet delicious.

After a little bit of research, I had it narrowed down to two recipes and finally decided to make this lovely banana nut bread. I got the original recipe from Joy of Baking.com and can be found here.I didn't really fiddle with it too much, I just halved it because I prefer to make bread in smaller quantities. It makes sure that it gets consumed before you get bored by it!

With some minor changes and some nuts, my first bread turned out really great! I haven't even spared a crumb of it! yum.. :)
Here's the recipe:


Low-fat Banana Walnut Bread

Ingredients: (Double the recipe to have a standard size loaf)

1 ripe banana (mashed) 
1/2 tsp baking soda
1/4 cup low-fat plain yogurt
2 tbsp canola, vegetable, or corn oil
6 tbsp light brown sugar
1 egg white
1/2 tsp pure vanilla extract
1/3 cup + 1 tbsp all-purpose flour
1/3 cup whole wheat flour
1/4 cup walnuts coarsely chopped
pinch of ground cinnamon (optional)
1/2 tsp baking powder
pinch of salt

  • Preheat oven to 350 degrees F (180 degrees C) and place the rack in the center of the oven. Spray an 5 x 2.5 inch(mini) loaf pan with a nonstick vegetable cooking spray.
  • In a large bowl, mix the mashed bananas with the baking soda and yogurt. Allow to sit while you prepare the rest of the batter.
  • Meanwhile, in a separate bowl, whisk together the oil, sugar, egg or egg whites, and vanilla. 
  • In another large bowl, whisk together the flours, baking powder, ground cinnamon and salt. 
  • Then combine the banana mixture with the oil mixture and then add to the flour mixture. Stir just until all the ingredients are moistened. Pour into the prepared pan and smooth the top. Bake for about 45 - 55 minutes, or until a toothpick inserted in the center of the loaf comes out clean. Remove from oven and place on a wire rack to cool.

I know my blogs have been mostly about baking..but with the wedding so close..I don't get to splurge a lot and end up making the usual.. but with the festive season coming to its peak in the next few weeks..you will surely see some traditional recipes from me..stay tuned!

Sunday, September 18, 2011

Farewell oh summer..

The summer has been a real roller coaster for me! A lot of things happened.. I moved.. I got engaged..got a new job..I started writing again..baking again..huff..the list goes on..
With the summer coming to an end I had to grab the opportunity to bake something summery before it was too late. I decided to buy stuff and convinced myself that it would compel me to bake ..especially when I was getting desperate to bake. My last trip to Trader Joe's set the stage for me. The store was full of lovely peaches and nectarines and I had to grab some.

I looked around for the various things I could bake with peaches and truly the list was endless. I left the choice to the better half and by his choice I was ready to make some lovely peach cupcakes.

I still had to control the amount of guilt I would get and decided to skip the frosting. The best part is the cupcakes turned out so moist and light that you didn't need anything else. I was in a mood to have something decadent and pretty much used the original recipe and it turned out to be great! Here it is:

Peach Cupcake
Ingredients: (Makes about 8-9 cupcakes)
1 cup all-purpose flour
1/2 tsp baking powder
1/2 tsp baking soda
1/4 cup butter / 1/2 stick of butter
1/4 cup sugar
1/4 cup brown sugar
1 egg lightly beaten
1/2 tsp vanilla extract
a little more than 1/2 cup low-fat yogurt
1 peach peeled, cored and chopped (I made 1/2 inch dice)


  • Preheat the oven to 350°F. Line the muffin cups with paper liners. I didn't have any so had to do without them.
  • Sift together the flour, baking powder, baking soda and set aside. Cream the butter and sugars together, beating until fluffy. Add the egg, scraping down the sides and bottom of the bowl, and then the vanilla. Gently mix in the yogurt. Stir in the dry ingredients and fold in the peach chunks.
  • Divide the batter evenly among the prepared cupcake liners. Bake for 18 to 22 minutes, or until a tester inserted into the center of cupcakes comes out clean. Cool the cupcakes for five minutes in the tin, then turn them out onto a wire rack to cool completely.
The original recipe suggested cream cheese frosting and I can imagine it would taste yumm... Here is the original recipe, if you guys are wondering what frosting to pair with. I did try making a low-fat version of the frosting for my cupcake which turned out to be pretty good. Here it is:

Brown sugar yogurt frosting
Ingredients: 
1/2 cup of greek yogurt / low-fat yogurt (extract out all the water from the yogurt)
4 tbsp brown sugar
1tbsp corn flour
  • Mix all the ingredients well and keep the frosting frozen to make it firm and only use it when the cupcakes cool down.
We had these as a dessert with some peach slices as well as for breakfast with coffee, in fact just now the better half had it with some whipped cream. Surely a recipe to make again and again. :)


Wednesday, September 14, 2011

Lentil madness..

As I mentioned in my earlier post, I was set on recreating some recipes from my childhood and one of my favorite ones was dosa! Mom would serve us hot dosas right off the tava and boy it felt heavenly! The spicy chutney and the rich sambhar would be just perfect! But back in India mom would either gather patience to ferment the batter.. (Read: only if we had guests) or else go to a local grocery store and pick up a bag of the ready batter.. anyhow those thin and crispy dosas were mouth-watering!

But I am even more lazier..and a drive down to the local Indian store doesn't really happen especially on a lazy sunday..so after a bit of digging around I decided to experiment with lentil dosas. My mom made this a couple of times, when she was bored with the usuals.. but I wasn't sure what combination she really used. So I decided to go with what I had in my pantry and it turned out beautiful!

I love lentils..can't really express how much.For these dosas I decided to use five different types of them! Yes five types of lentils! Of course these dosas are a spin-off of the originals, but with the variety of the lentils, there is no end to the combinations one can conjure up. The best part being the dosa batter is ready in a few hours, no need to wait overnight for the fermentation. Here's my rendition of this lovely lentil dosa:

Lentil Dosa
Ingredients:
1/4 cup toor dal (Split pigeon pea)
1/4 cup moong dal (Split mung beans)
1/4 cup whole moong (Mung beans)
1/4 cup chana dal (Split bengal gram dal)
1/3 cup urad dal (Split vigna mungo bean)
1/3 cup white rice (any variety should do, I used basmati)
2 dried red chilies
1 inch ginger roughly chopped
oil for making dosas
1/2 onion
salt to taste
Clockwise from the top: Chana Dal,Whole Moong, Toor Dal, Urad Dal, Moong Dal
  • Soak all the lentils and rice in water for 6-8 hrs.
  • Grind the soaked lentils and rice to a coarse texture along with the red chillies and ginger. Season with salt. The batter should have a medium consistency but a bit thicker than the usual dosa batter. Let the batter rest for about 10-15 minutes.
  • Now heat a non-stick pan. Sprinkle a few drops of water and let them evaporate or just use an onion and mop it over the base. Pour two spoonfuls of the batter and spread out the dosa with a light hand. The dosa isn't supposed to be very thin, but I had kept some batter for the next day and managed to get very thin dosas with it.
  • Let one side get a bit crispy and sprinkle few drops of oil and turn the dosa over. Let it get cooked and served with a spicy coconut chutney or sambhar. Enjoy!

This recipe goes into my favorite recipes list and I will most surely make it again!
With all the lentil madness going on, I am definitely entering this one into the monthly MLLA event initiated by Susan and guest hosted by Cathy this month.
Also entering this one into the Flavors of South India event hosted by simply.food.
Have a good week everyone!

Tuesday, September 13, 2011

Melange full of yumminess!

With Ganpati festival.. I was going veggie for 10 days and had to conjure up some yummy treats to truly enjoy this time.. and we definitely had some delicious meals.. Of course no Ganeshotsav is complete without modaks, and I made a small batch this season..
I have definitely had better times with them..my rice flour wasn't fresh and I had to pay a price for that. It took me a real long time to make the modaks, because my dough would crack easily if it was made too thin..urgh.. nonetheless I did not give up and at the end they came up pretty good..the flavor was dot on.. that's one pat on my back..especially since the better half enjoyed them a lot!


But Ganpati brings back some lovely memories and more often than not makes me really emotional. With the ten days of Ganpati I was intent on recreating some of these lovely dinners that I truly cherish. A simple yet fun meal which was loved by everyone at home is misal!
I was googling around for various versions posted by other people and I infact found an official wiki page for it right here. :) Here is my version of the misal, more rather my mom's version with my dad's specifics. Yes, very few recipes had my dad's input in them..and he made sure that if this recipe was made it would have his required ingredients in them. So here goes:

Misal meaning mixture in Marathi is comprised of a bunch of components, namely:

Usal, matki (moth beans) curry
Ingredients:
1.5 cups sprouted matki boiled
1 medium onion sliced
1 medium tomato chopped
1-2 tbsp Garam masala
1 tbsp Dhaniya-jeera powder
1-2 tbsp red chili powder
1 tsp mustard seeds
1 tsp turmeric power
1-2 tbsp grated/shaved jaggery (gul)
4-5 curry leaves
1.5 tbsp oil
salt to taste
  • Heat oil and saute the mustard seeds,curry leaves and onions followed by tomatoes
  • Add the jaggery and the spices, let it simmer for a few minutes.
  • Add the matki with all the residual water. Adjust the water if required.
  • Season with salt and adjust the flavors to your liking.
Tarri (Spicy gravy)
Ingredients:
1 medium onion chopped
1 medium tomato chopped
1 inch ginger finely chopped
2-3 cloves of garlic finely chopped
2 tbsp red chili powder
1 tsp mustard seeds
1 tbsp oil
1.5 cups water
salt to taste
  • Heat oil and saute the mustard seeds,ginger,garlic and onions followed by tomatoes
  • Add the spices and the water. Let it simmer and keep it on until it reduces to half. Season with salt.
The rest of the ingredients for misal are: 
Batata Bhaji - boiled, diced potatoes seasoned with spices and lightly sauteed in oil. This is a requisite for my dad, he says the bhaji makes the misal a more complete meal.
Chivda, farsan & sev (My dad had to have a specific kind of chivda for the misal, I was so excited when I found it in the Indian store here,surely something to have when he visits again.)
Chopped onions,tomatoes and cilantro


To assemble the misal, start of with the bhaji, followed by the usal. Add the chopped onions and tomatoes followed by the chivda and top it off with the tarri and some sev. A delicious melange of yumminess is ready to be enjoyed! Enjoy!

Friday, September 9, 2011

Je t'aime, Paris!

I still wish my day starts with wishing someone..
Bonjour!!
Hmm I guess only in my dreams...
I so didn't wanna be back! The three days I spent in this city passed by like a flash of light..truly a magical city.. Paris!!! I know I won't be the first one to say how awesome the city is but this post is just going to be my way of jotting down my thoughts for everything I felt about this city. Yes, its quiet late..but its never too late to post.. :P

I went off to Paris with a very excited yet open mind and very little knowledge of the French language. But truly the experience couldn't get better! The city welcomed me with open arms.. the weather turned out to be really great.. with some showers here and there..which only added to the beauty of the city!
So enough of me blabbering around about the city..I did manage to visit most of the tourist spots..n used the metro everywhere! It was a lot of fun..n definitely the pics will say it all...

Paris
With hardly anytime at hand, I literally had to take a long stroll through Louvre..

 
Splendid sculptures..some glimpses from Louvre!

But of all the things that I saw, they was one structure whose mind-blowing beauty had me mesmerized! Its the Opera.. 


The interiors are truly made for the grande royals! I just couldnt imagine what it would be back then..I wish I had the opportunity to actually watch a show in the splendid amphitheater.. I am still mesmerized by these pictures..


The only thing I am guilty of is the fact that I didn't photograph all the yummy things I had! But there is always a next time and there will be surely be one for Paris!
I will be posting a bunch of overdue blog posts today and over this weekend...I have gotto give some much needed attention to my blog!
Stay tuned!
Revoir!

Sunday, August 21, 2011

Comfort food - Part 2

Yes, its that time again, when I am all alone..for about 2 weeks! :(
With my fiance off to Paris, its been boring week. My work has taken most of the time  and cooking really wasn't on my priority list. But every girl has her needs and I definitely needed some good old comfort food.
So today's blog is going to be listing some of my favorite recipes:
(I apologize for the bad quality of pictures. The good camera is travelling too..so I have to resort to my poor phone camera)

So the first one is a true pleasure food for me..of course it comes with its own package of guilt..but thats not to be considered for now. :P

Batata Kacharya (Indian-style potato fries)
Kacharya is a Marathi word which means cutting thin slices, in this case potato slices. Its a real simple recipe where in you just saute the slices in a oil which is flavored using basic Indian spices. Here is the recipe,

Ingredients:
2-3 medium size potatoes (I usually use white/yukon gold, easy to use with skin)
1 medium onion thinly sliced
4-5 curry leaves
1 tbsp mustard seeds
1 tsp turmeric powder
1/4 tsp asafoetida powder
1 - 11/2 tbsp red chilli powder
salt to taste

  • Wash and clean the potatoes properly, I use them with skin, but you can peel them if you want. Cut potato into two halves and cut each half into thin slices uniformly. The slices have to be really thin so as to cook them without need of water. Place the slices in a bowlful of water until ready to cook.
  • Heat oil in a wok. Add mustard seeds. As they splutter, add asafoetida and turmeric powder, followed by curry leaves.
  • Add the sliced onion and let it saute well. Add the red chili powder, makes it easier to get it uniformly spread.
  • Now add the potatoes and mix them to cover each piece with oil. Fry the potatoes on medium-high flame for 7-8 min continuously making sure that they don't stick to the bottom of pan. Cover for 5 minutes or until the potato pieces are just tender. Remove the lid and add salt.
  • Turn the heat to high and keep stirring the potatoes until almost crisp. Serve with chapati or phulka. I usually accompany this with a salad/raita to waive off the guilt. :)
The next one is something that I have learned to use in anything and everything. I absolutely love mint chutney. I have made recipes which incorporate this chutney with rice, potatoes, chapati, bread and of course Indian chaat. I usually make this chutney in batches and use it all throughout the month. 
Back in India, I would spread it on chapati and toast this to a crisp texture. It was such a simple yet healthy snack for those evening cravings!
But this week, I was dreaming of a devilish grilled cheese sandwich! So right at the beginning of the week I made this chutney and have been making this simple sandwich all week. :) 
Mint chutney is a well-known recipe amongst Indians and has its own variations created throughout different households. Here is my version,

Mint chutney-grilled cheese sandwich
For the chutney:
1 bunch fresh mint leaves
2-3 cloves garlic
1 inch piece ginger
4-5 green chillies (vary them based on your choice) 
1 tbsp lime juice
salt to taste

For the sandwich:
2 slices of bread
shredded cheese of your choice
  • Grind the leaves,ginger,garlic and chillies to a smooth paste. Add little bit of water if required to help in grinding and adjust consistency. Add the lime juice and salt and adjust to taste.
  • Store it in a air tight container and refrigerate.
  • Now to make the sandwich spread a spoonful of the chutney on each slice. Add the cheese and toast the sandwich until the cheese melts. Enjoy!

I have to work over the weekend but hopefully it will be all worth by the end of the upcoming week. I finally go on a mini vacation after almost 1.5 years! Yes I cant believe it too! I will report back with all the updates! :)
Have a good week everyone!

Tuesday, August 9, 2011

An old favorite..

The reason for reposting this recipe is two-fold, firstly because I made it again as promised in my original post here and this time I have pictures!
This recipe truly reminds me of life back in Mumbai. My mom first got this recipe from her best friend and since then it has been my all-time favorite. It makes for a complete meal and you dont really need anything else with it. I have tried the same recipe with different types of legumes like whole brown lentils as well as different types of chickpeas.

And secondly..
When I came across a blogger event through Snehal@Foodlicious, I jumped on it and thought it would be a good idea to participate and get to know other fellow bloggers. When I found out that the event was about legumes, I had to submit this recipe. This is the MLLA event hosted by Preeti this month. This event is initiated by Susan and is hosted monthly by different bloggers. Instead of going the usual experimental way, I decided to present you with the original recipe that I learnt from my mom. So here goes..

Masoor Pulao (Lentil Rice)

Ingredients:
1 cups Basmati Rice
3/4 cup - 1cup Whole Brown Lentils (Masoor) (soak them for about 2-3 hrs)
1 medium onion sliced
1 large potato diced
4-5 cloves garlic chopped
1-1.5 inch piece ginger chopped
2-3 green chilies
4-5 cardamoms
8-10 cloves
2 small pieces cinnamon
1 tsp turmeric
1 tbsp red chili powder (or amount based on your liking)
1.5 tbsp garam masala powder or biryani masala or any other curry mix usually works.
1 tbsp cumin seeds
1 tbsp oil
  • Grind/mince the ginger,garlic and the chillies in your processor (I prefer the old way of using mortar and pestle.)
  • I usually make this in a pressure cooker but you can make this in a stew pot too. Start with adding some oil to the pot and once it heats up add the cumin seeds,turmeric, followed by the ginger,garlic and chili paste. Saute them for a minute and add in the onions.
  • Once the onions turn transparent,add the potatoes and saute for about 8-10mins to get a color. Add the lentils and let them saute for a few minutes. Add in the spices and let them cook for a few minutes. Finally add the rice and let it saute. Add 2 cups of water ( i.e. twice the amount of rice) and bring it to a boil.
  • Once it starts boiling add salt to taste and keep it on the saltier side so that once its cooked it will be the right proportion.Place the lid and allow about 2-3 whistles or on a stew pot you can check to see if the rice is cooked. Serve hot with a spoonful of ghee (clarified butter) or a side salad/raita.

Legumes have been an important part of our diet through my childhood..and a true favorite..I always chose them over all the vegetables I didn't like.. :)..so this event is just another excuse for me to try and use them in all possible ways. Enjoy!

Sunday, August 7, 2011

Calm down o weather..calm down o me!


Alright this has turned out to be a real long one! But this is a simple effort to make up for the sporadic posts in the last few weeks.
The past week was a real mixed one for me.. I started off the week with a fiasco in making something..n I guess that trend lasted a few more days.. the weather wasn't rewarding either! I was hardly making progress at work..n to top it off we had a small tiff at home.. truly the heat got to me. So to cool things down at home as well as in me I had to come up with something light..quick n still delicious..
I had ample of arugula at home because of an earlier fiasco I mentioned and had to consume it, so I decided to make something I had eaten at an organic food truck in Del Mar. It was a arugula pesto sandwich which was really light and delicious. Usually a pesto is made with pine nuts but since arugula has a strong flavor, I decided to pair it with walnuts and it surely was a good idea.


Arugula pesto-avocado sandwich

Ingredients:
For the pesto:
2 cups packed baby arugula leaves
1 cup walnuts roasted
6 cloves garlic (roasted with skin on)
1 clove garlic peeled and chopped
4-5 tbsps extra virgin olive oil
1 lemon

For the sandwich:
2 avocados
4 slices provolone cheese
8 slices whole wheat bread
1 cup walnuts roasted
Salt and freshly ground pepper

  • Brown 6 garlic cloves with their peels on in a skillet over medium high heat until the garlic is lightly browned in places, about 10 minutes. Remove the garlic from the pan, cool, and remove the skins.
  • Combine the arugula, walnuts, roasted and raw garlic into a food processor. Pulse while drizzling the olive oil into the processor. Remove the mixture from the processor into a bowl. Squeeze in some lemon juice and season with salt. (NOTE:Because the pesto is so dependent on the individual ingredients, and the strength of the ingredients depends on the season or variety, test it and add more of the ingredients to taste.)
  • Now to make the sandwich just spread the pesto graciously onto each slice.Place a cheese slice on half of the slices and toast them in a skillet on medium heat. Once the cheese has started to melt, place avocado slices and season with salt and pepper. Top it off with the another slice and toast the sandwich well on both sides. Serve hot with a side salad or just as it is!


Now the peacemaking process didn't just end there.. I was a depressed baker since my first try at macarons was a sheer failure and had to bake something right. Knowing that my fiance loves biscotti and on reading Deeba's blog about these lovely biscottis, I had to conjure up a version of my own and here it goes..

It was again a first time for me to bake these goodies and after some research I decided to make my version of this one. I actually loved the suggested combo.. dried cranberries..n pistachios..yum! But I decided to stick with ingredients readily available at home..n had a huge batch of almonds lying around..so had to use them.

Note: Since it was my first time, I laid easy on going too healthy..still I managed to use wheat flour for 50% of the flour requirement..and it came out really well..n no effects on texture,crunch or color (means me doing the dance around my kitchen :P) Next time I am trying 100% whole wheat flour and brown sugar.

Cranberry Almond Biscotti

Ingredients:
1 cup All-purpose flour
3/4 cup Whole wheat flour
2 eggs
3/4 cup sugar
1/2 cup dried cranberries
1/2 cup roasted almonds, coarsely chopped
1 tsp vanilla extract
1 1/4 tsp baking powder
1/4 tsp salt
  • Preheat oven to 350 degrees F (177 degrees C) and place the oven rack in the center of the oven. Line a baking sheet with parchment paper. Set aside. I finally bought a Silpat mat for myself, at least this is going to save me all the parchment paper I use up.
  • In the bowl, beat the sugar and eggs rigorously to get a thick, pale, and fluffy texture (about 5 minutes). (When you slowly raise the beater the batter will fall back into the bowl in slow ribbons.) At this point beat in the vanilla extract. In a separate bowl, whisk together the flour, baking powder and salt. Add to the egg mixture and beat until combined. Fold in the chopped almonds and cranberries.
  • Transfer the dough to your lined baking sheet and form into a log, about 12 inches (30 cm) long and 3 1/2 inches (9 cm) wide. You may have to dampen your hands to form the log as the dough is quite sticky. Bake for 25 minutes, or until firm to the touch. Remove from oven and let cool on a wire rack for about 10 minutes.
  • Reduce oven temperature to 325 degrees F (165 degrees C). Transfer the log to a cutting board and cut into 3/4 inch (2 cm) slices, on the diagonal. Place the biscotti, cut side down, on the baking sheet. Bake for about 10 minutes, turn slices over, and bake for another 10 minutes or until golden brown. Remove from oven and let cool. Store in an airtight container. Makes about 12-16 biscotti. Enjoy with a hot cup of coffee!

So with my week set right, my weekend had to be a good one and passed by like a flash of light.

For this week, I have a few things planned and hope its a more fulfilling week than the last one..fingers crossed!
Have a good week everyone!

Saturday, July 23, 2011

Simplicity at its best!

I started off my weekend by finally going for the Harry Potter movie. I was really looking forward to watch it, but apart from the movie, I had something else on mind and was far more excited about that. I was determined to get a couple of must-have and good-to-have things for our home. And today was a good day for that.. :P I managed to get a new gas-top grill/skillet and a lovely dutch oven. I also got an ice-cream maker and cant wait to make the first batch of frozen yogurt.

After thinking over what I bought today, I actually understood that I indirectly made some healthy choices. As the wedding date gets closer, eating healthy is becoming a necessity and day-by-day me and my fiance have gone down on the quantity and type of food we consume. I try to shop for things on a daily basis and make conscious choices towards consuming whole grains,fresh fruits and veggies. And these recent purchases are surely going to help me through my usual cravings.

We usually spend saturdays with friends but without a set plan,we both decided to relax and stay in. With that I got the opportunity to officially inaugurate the new grill. :) I wanted to make something quick and simple using the grill and started thinking of grilling pita bread to make a simple sandwich. With basic ingredients at home I decided to keep it simple and to my delight, it came out really well.

Veggie pita-bread sandwich

Ingredients:
4 - whole wheat pita-bread
1-2 cloves garlic chopped finely
1 - onion sliced
1 - green bell pepper sliced
10-12 mushrooms (I used crimini,gives a very earthy flavor)
3 tbsps - dijon mustard
1 tbsp - balsamic vinegar
2-3 tbsps - olive oil
1 tsp ground chili flakes
salt and freshly ground pepper
  • Drizzle olive oil into a heated skillet/non-stick pan. Once the oil is heated add in the garlic and saute for a minute, followed by the onions.
  • Once the onions are a bit caramelized, add in the rest of the veggies. Let it saute for about 6-8 minutes. Once the veggies are cooked, season them with salt,pepper.Sprinkle some chili flakes to give it a kick!
  • Heat another grill/non-stick pan and use a oil spray to coat the base. Place a pita bread and let it get toasted from one side. Add a few spoonfuls of the veggies and make a roll out of it. Let it get toasted on both sides.
  • On the side, mix the mustard and the vinegar to make a garnishing sauce.
  • Serve the rolls piping hot with the sauce. Enjoy!


I am so happy that I got this grill and the dutch oven. Both are made of cast iron and using them really gives a very rich flavor to the food. I remember back in India my mom still uses a cast iron kadhai (frying pan) and she is very possessive about it. :P It so wonderful to see that such simple things can make such a big difference!

Sunday, July 10, 2011

Weekend fun..


After going through a variety of options - online as well as in-stores I had given up on finding a good set of coasters. As usual an idea popped and I started looking for designing coasters at home and finally ordered a simple set of plain cork coasters with a holder.

I had kept two choices on what the designs should be and finally decided to recreate Warli Art patterns. Warli Art belongs to the Maharashtra state of India and has been dated back to 2500 BC. You can read more here.

I had started making these about 2 weeks back but ran out of the black marker until yesterday when walking around the theater waiting for the movie (went to see Transformers 3D, you have wait in line almost an hour before!) I stumbled upon an Aaron Brothers store and found bliss! :P I never knew they sold art materials. After walking into the store with sheer excitement I made a mental note of all the materials I had on my mind and set out to find them all.

I used Sharpie's oil paint based marker to draw the designs and use a acrylic sealer to make the drawings water-proof. Since I used cork coasters I had to coat them before and after with the acrylic sealer as cork material is highly porous. (Note: Allow enough time (6-8hrs) for the design to dry off before you spray on the sealer again)

Below is the finished project:


Summer has officially started in San Diego and hoping to have some chillin' weekend time!
Have fun everyone!


Sunday, June 26, 2011

Couple of projects over a couple of days..

This weekend was a real busy one..can be called a great success with almost everything planned being accomplished. I had a bunch of projects planned this weekend.
When I left the east coast my friend presented me with a gift card from my favorite art supply store. Blick Art store is one of my favorite places to visit. Its like going to Disneyland and splurging! So finally on Friday my ordered materials arrived and I was super excited to get started.


The first one was to paint the for-now only terracotta pot in my home..surely more to come. After contemplating on the various designs I chose something very simple yet colorful.


The second is something that's actually going to be part of a bigger project which I will reveal in the coming days but for now I finished painting a ceramic platter in a painting studio called Ceramic Cafe in Del Mar,San Diego. Its a real cool thing to do, you basically go in, choose a piece and paint on it.They then fire and glaze the piece for you and you can pick it up in a few days, all ready to be used. I chose a big serving platter and created a simple floral design on it. I will know the final outcome on Friday, till then here are few pictures of the piece in process.


I have a lot of things lined up for the coming week..so hoping to have a busy but fun week..with a happy end to it.. :)

N the finished product..


Thursday, June 23, 2011

Memories of singlehood

Not too long ago..but surely feels like a while back that I was single.. :)
It brings back some fun memories for me.. I remember back in Jersey I would hardly have a proper dinner on weekdays..mainly because I used to work pretty late and also since I lacked company. I remember having just hummus and crackers along with some fruit for dinner. I know that's a weird combination but I still enjoyed it.. or just having a big bowl of cereal followed by a small piece of chocolate..aah..I do miss that sometimes.
For the past few days I have been living up my past life again. My dinners have involved something really quick and simple to make which usually categorized as a snack or an appetizer. But nevertheless they are delicious!

The first one is a salad which I remember having it the first time at my friend's place literally a few days after I had first arrived in US. Her mom had prepared a lot of food and it was my first time ever for tasting asparagus..and to tell you the truth it was love at first sight! :P I don't know why and how but since that day asparagus has been one of my most favorites veggies!
So here goes, its a simple asparagus pasta salad. I usually make it real simple meaning doesn't involve 'real cooking' but this time I looked it up and made it similar to this recipe by Rachel Ray. I didn't include all the veggies she recommended since I didn't have them.

Asparagus Pasta Salad


Ingredients:
10-12 asparagus stems
1/2 cup Green peas (Defrost if frozen or get them par-boiled before use)
1 cup pasta, cooked to al dente and cooled (can use farfalle i.e.bow-tie pasta or macaroni)
2 tbsps olive oil (EVOO) - you can adjust it to your liking
1 tbsp rice wine vinegar
1/2 onion chopped
salt and freshly ground black pepper
  • Heat the onions and oil in microwave safe covered dish for 30 seconds or in a small pan on the stove top over medium low heat for 5 minutes. Allow oil to cool back to room temperature.
  • My asparagus wasn't very fresh and so I had to snap the lower ends of the stem. Par boil the asparagus tops in 1 inch simmering water covered for 3 to 5 minutes. Cool under cold running water and drain. Cut asparagus into 1-inch pieces on an angle and add to a bowl along with the peas and the pasta.
  • Whisk the vinegar and the olive oil and pour the dressing over the salad and toss. Season salad with salt and pepper, to your taste and toss again. Enjoy!


The next one is something that brings back childhood memories for me! It was one of my favorite snacks back home. The texture, the spicy-tangy flavor..just too yummy! Its a recipe well known in Maharashtrian households. Its called Dadpe Pohe. In Marathi "Dadpe' means to soak pohe (flattened rice flakes - thin) in very little water and then add some pressure to them to get them crushed,not too much to avoid clumping.

I am being lazy here and not writing the whole recipe out but rather giving you this link to a blog which has the recipe well written and with a picture.

P.S. Sorry for the poor quality of pictures..my phone can only do so much.

Sunday, June 19, 2011

Comfort food

There are different kinds of comfort food for me..its varies from spicy to sweet!
With my fiance off on a business trip, I was really missing him and feeling very lonely.

I was trying to keep myself busy with things and planned my day.. my initial plan was to make bread but just didn't get the drive.. My aim was to have it as my breakfast for the week..but I suddenly had the craving for something sweeter and I found myself reminiscing about something I loved back when I was living in Jersey.

NJ and NY have abundance of good bakeries and one of them was located on my way to work. My colleagues and me would ensure we took full advantage of this!! It was the Zaro's Bakery. Working in Newark and having a good bakery around was really an unusual thing! Zaro's had a great variety of muffins and cookies (real big ones!). I loved their white chocolate and macadamia nut soft cookies..they were heavenly! Since then, I always end up hunting for a similar one!

I was craving for those cookies but just couldn't get myself to buy one of those! So then I thought, why not make them myself.. n why not make a healthier version of those..n have those instead for breakfast! I also had a bunch of other reasons to bake something. I recently bought a new set of mixing bowls and had to use them sooner or later! I also got myself a new phone and decided that my cookies would be the first thing I click!

So the goal was to make sure the essence of the cookie was maintained but in a healthy way, obviously I decided to go the Oats way. The original recipe asked for using all-purpose flour but I used whole wheat. I also substituted half of the sugar for honey and reduced the butter by a little bit.

White chocolate & macadamia oatmeal cookies

Ingredients: (Makes 12 cookies)
1.5 tablespoons butter, softened
2 tablespoons honey
2 tablespoons brown sugar
1/2 egg
1/4 teaspoon vanilla extract
7-8 tablespoons whole wheat flour
1/4 teaspoon baking powder
1/4 teaspoon baking soda
1/4 cup and 2 tablespoons rolled oats
1/4 cup chopped white chocolate
1/4 cup chopped macadamia nuts


  • Preheat oven to 350 degrees F. Grease cookie sheets (used parchment paper to avoid the greasing).
  • In a large bowl, cream together the butter, honey, and brown sugar until smooth. Beat in the egg, then stir in the vanilla. Combine the flour, baking powder, and baking soda; stir into the creamed mixture. Mix in the oats, white chocolate, and macadamia nuts until evenly distributed. Refrigerate this mixture for about 15-30 mins. Drop by teaspoonfuls onto the prepared cookie sheets.
  • Bake for 10 to 12 minutes in the preheated oven, or until edges are toasted. For crisper cookies, bake longer. If you leave the cookies on the cookie sheet for a few minutes before transferring to cool on wire racks you will have a softer bottomed cookie.

These came out really well. So light and yummy, and not too sweet, which is just perfect for me. I baked them for 12 mins to get the crunch. So as far as the week goes I definitely have a good start planned for each day. These cookies were so simple and quick that I already plan to make another batch in the week with a different combination.
Happy baking!

P.S. All pics shown here were clicked through my new phone! :)