Life..a miracle

Life..a miracle

Saturday, July 21, 2012

Something old..something new..

This post has been long due! I was actually suppose to post this one last september but today is the day that I finally got around to posting it. The topic of this post is truly apt! This post started off to showcase my growing love for Mexican food. An idea struck and I wanted to show you why I first started loving Mexican food and how far I have got on experimenting with it!

Back in school, one of our usual lunch options was chickpea burrito from a Mexican food cart. It used to be yummy! And I was truly thrilled to find chickpeas in a burrito!
Since coming to San Diego, I cant seem to get enough of Mexican food. Here in SoCal, its the best cuisine you could find and offers you regional variations in the food. It is here that I learned that eggs are frequently used in Mexican cuisine too and they taste amazing! So last year when I actually started making Mexican dishes at home, experimenting with eggs was a no-brainer.
So today I present you two recipes..

Something old..


Chole burrito (Chick-pea burrito)


Ingredients:
2 cups boiled chickpeas
2 tbsp tomato paste / 1 tomato chopped
1 chopped onion
2 cloves garlic minced
1 tbsp coriander-cumin powder
1.5 tsp red chili powder
salt to taste
1.5 tbsp oil
1/4 cup shredded cheese (I used the mexican mix)
1/4 cup thinly sliced onions
1/4 cup rice (optional)
8 mini tortillas / 4 standard ones


  • Add some oil to a pan and let it heat. Once heated add the garlic and let it brown a bit. Drop in the onions and saute them well.
  • Add the red chili and the coriander-cumin powder and let the spices get cooked.
  • Add in the tomatoes and let the whole thing saute well.
  • Finally add the chickpeas and season well. Let the spices seep into the chickpeas and let it simmer for about 5 mins. The chickpea mixture is now ready.
  • Now to assemble the burrito. Heat the tortilla on one side and flip it. Now place some cheese at the center and add the chickpea mixture. Top it with some onions and rice and wrap the tortilla, you can seal it by placing some cheese between the fold and turn over the burrito. Let it heat for a min on the other side. 
I usually serve my burritos with fresh guacamole sitting on a lettuce bed and some spicy salsa!  :)
Now for,
Something new.. 
I have actually made several variations of this recipe and it all started with this specific one posted by Kevin from Closet Cooking. 

Asparagus & egg enchilada


I really dont have a specific recipe for this. Since eggs are so versatile, I usually mix them up with a variety of veggies or sometimes just use the basic scrambled eggs recipe. Give it your own spin and you will surely not be disappointed! Another easy thing to use the Indian style egg bhurji which is basically scrambled eggs seasoned with curry masala. 

The same base can easily become a burrito / enchilada. For the enchilada sauce, I usually also keep switching the flavors of my sauce too. I know the pictures aren't the most perfect ones..but it was delish!
 As you see my love for Mexican food is growing and I hope to learn more authentic recipes and someday I hope I get a chance to go to Mexico and try out the real stuff! :)

Monday, July 2, 2012

Summer time rush..

Summer time is supposed to be all about relaxing and chilling out in the sun..but come this summer and I have been rushing through the door day in day out! It has been crazy busy but it has been all great.. :) June began with a work trip to St.Louis and I was physced! The trip went really well and I did get some time to drive through downtown St.Louis and get a glance of the lovely arch! The arch was absolutely beautiful and it was a lovely sunny day to be at. 


On one of the weekdays I drove through a mall nearby and found something really uncommon in one of the artsy stores. They had live crabs for sale called Hermit Crabs!


The shells on the crabs were painted with cute patterns and at first glance one would have really no clue that there was a crab in it! I was almost tempted to touch one of them..

The rest of the June past by with more work and really didn't leave me anytime to bake. This has been the first month in a long time that I did not bake! Hopefully I will make up for it this month. :) I did cook a lot and in fact I can now proudly say that I make really soft fluffy rotis! :) That was one more thing I had to master sooner or later and practice for the past month has made it possible. 

With summer I am reminded about India. This would be the season when one would get the best of the tropical fruits! The markets would be loaded with mangoes, cherries, jackfruits and lychees! It was years since I had a yummy lychee and the other day at the Indian grocery market I spotted them! I literally ran to grab a bunch and the moment I was home I was enjoying the fresh flavor! Along with these lovely fruits the one thing that I miss about India is the 'Naturals' ice-cream. Its a local chain that sells fresh fruit ice-cream which ranges everything from coconut, chikoo to lychee ice-cream! I got so nostalgic that I just had to make it and ofcourse of a healthier kind! The ice-cream came out to be really rich and bursting with flavor. I experimented with the recipe using the basic vanilla ice-cream recipe as my base. Another great way to use lychee / lychee juice is in cocktails! I cant wait to buy my next batch and experiment with it..ummm! :)

Lychee by itself is really yummy and I can finish a dozen in a matter of minutes..really seconds.. :P But the best part about it is the health benefits that lychee has, read on here for more! Though to truthfully say it I love lychee for its flavor and really had no clue about how healthy it really is until recently. 


Lychee Honey Ice-cream

Ingredients:
1 cup chopped lychees or use the canned one with the juice from the can
1.5 cups 2% milk
1 cup heavy whipping cream
5 tbsp honey
4 tbsp sugar
1 tsp vanilla extract
Zest from 1/2 lime 
  • In a large bowl, mix the milk,cream,honey and sugar. Once mixed well, add the vanilla extract followed by the lychees and the juice. Let the mixture refrigerate for 1-2 hrs.
  • Take the mixture out and mix the zest in and pour the mixture into your ice-cream maker. Follow the instructions on your ice-cream maker and let the ice-cream churn. Transfer to a freezer-proof box and let it refrigerate for 2-3 hours at a minimum. Enjoy!


Work has taken most of my time away in the past month and I am really trying to keep myself on track with my usual schedule..so here's hoping to getting back to more blogging and enjoying the summer with all my readers! Have a great 4th of July everyone! :)

Monday, May 28, 2012

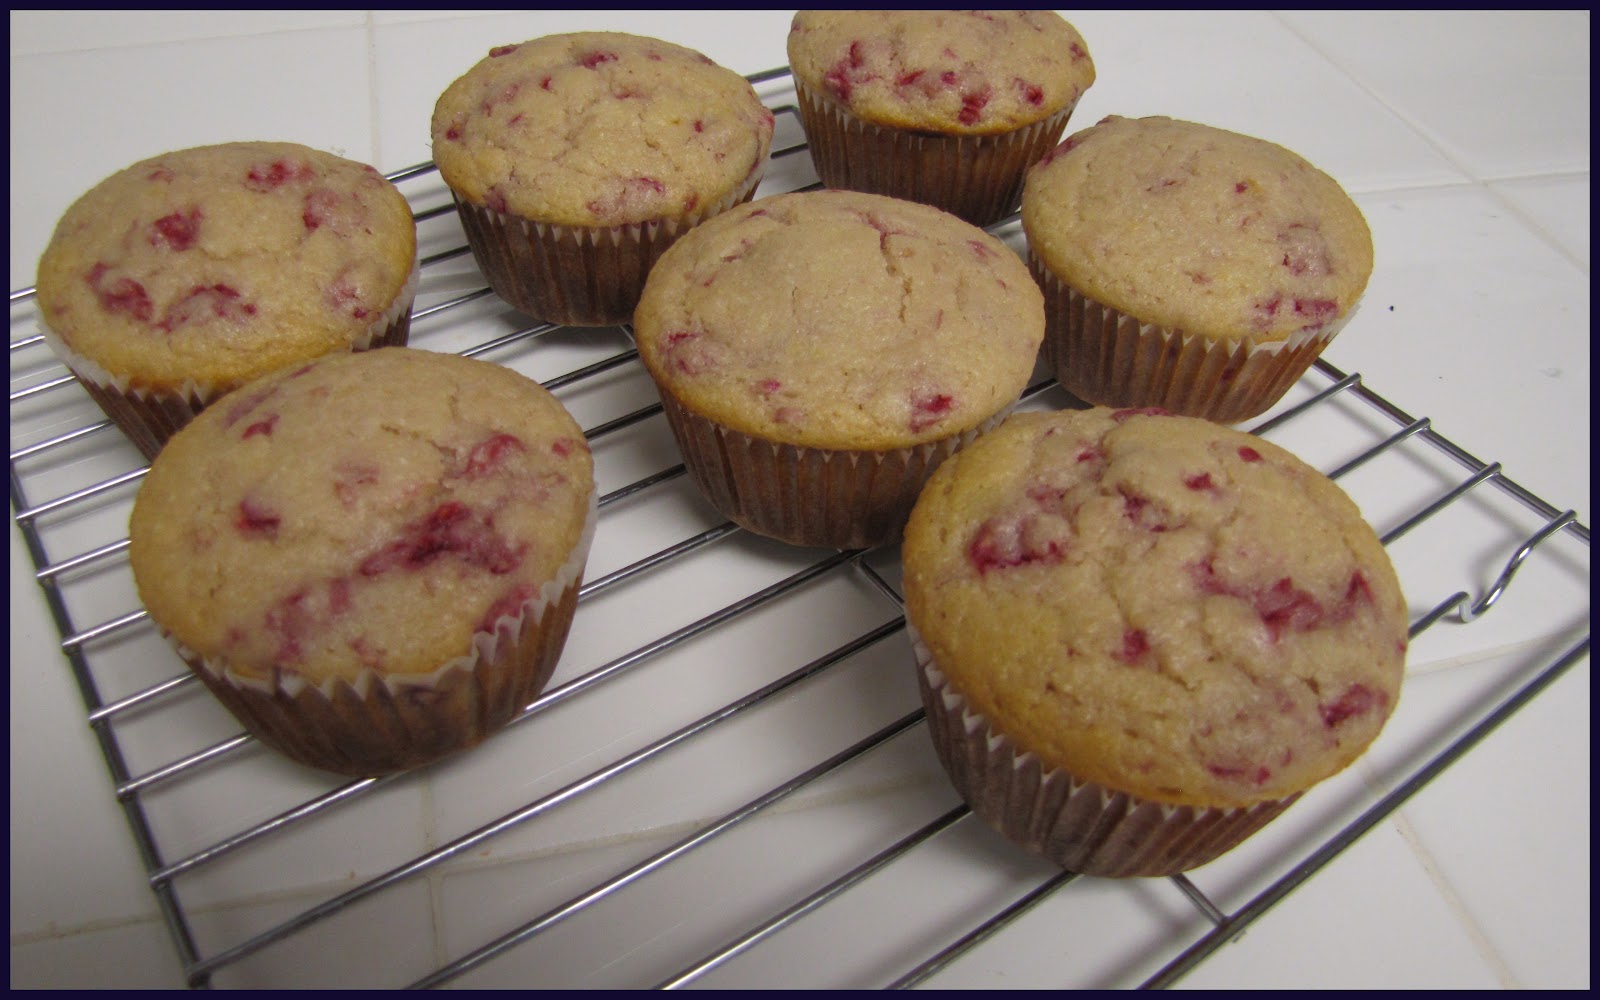
Raspberry semolina muffins..so spring!

I cant believe it has been a month since the bake sale and here I am. The past month has gone by at warp speed! We had my parents visiting us for about 2 weeks which included several family dinners and my brother's graduation! woo-hoo!! Kudos to him for graduating from USC! :)

My baking has been fairly less mainly because we have been eating out way too much..time to dial down the crazy, but I just couldn't miss out on participating in the monthly #baketogether challenge. 
It was the perfect timing since my parents got to experience my baking and this month's recipe for Cornmeal Buttermilk Muffins is pretty much the recipe I use every time I want to make healthy muffins. But instead of using cornmeal I tend to use semolina which gives the same kind of texture but is made from rice/wheat.


Here are the modifications I made to the basic recipe:
1 cup chopped raspberries
3/4 cup all purpose flour
1/3 cup wheat semolina
3 tbsp sugar
2 tbsp honey
2 tsp baking powder
1/4 tsp table salt
1 tsp lemon zest
1/2 cup yogurt, at room temperature
1 large egg, at room temperature
3 tbsp canola or vegetable oil
1/2 tsp pure vanilla extract

Follow the same directions as mentioned in the original recipe. I only got a couple of snaps of these muffins, with family around these were gone by the next evening. I did pack a couple and gave it to my parents for their trip and felt super glad that I could share my baking joy with them.

Oh and another thing that I am super excited about is my first set of plants! I have planted tomato, chili, basil and cilantro. So far the tomato bears lots of flowers and I hope to get some fruit soon but my chili has given me a good amount of hope, I got my first big chili! Look..


..until next time..have fun!

Wednesday, May 9, 2012

Bake Sale Recap & macaron musings..

I am no expert when it comes to baking, none-the-less macaron making, oh it rhymes.. :P But it has been a really great learning experience for me, not only for learning the right way of whipping up a meringue but rather learning to respect each ingredient. This post is going to be a way for me to document my lessons for macarons and also to help out other bakers who have given up on macaron making. I urge everyone to not give up this magical cookie, just try and stretch your patience and reduce the level of your expectations when you get started with this. But before I go on with my macaron trail, I want to share some photos and some posts from fellow bloggers who participated in the sale.

I of course made macarons in two flavors: Lemon macaron with mango butter & Raspberry macaron with dark chocolate ganache. umm..ummm! I went through a turmoil in terms of deciding what I should pack them in. I didn't wanna spend crazy $$ on just boxes but putting them in a small treat bag  felt like laziness and made me super scared that they would be crushed by someone. So inspired by a post by Bakerella right here, I decided to make my very own box template and the end product came out to be something so cute! :) 


As usual, keeping the boxes for the last minute only made my time management crash down, but with help from the lovely hubby I finally managed to get my stuff to the bake sale! It was an amazing experience! Its a great thrill to see people's reaction right then and there and understand how people look at food. I got some really good reviews for the macarons, and was elated when I got some mentions in blog posts too. :)

I also got to meet some really great people, who share the same passion of food as me. In the hurry to get to the sale, I forgot my camera, and so now I can only provide you with some links to posts from other bloggers. While selling macs, I also went around and bought some goodies! I bought the Orange Chocolate Tart from Ann, the cinnamon and cardamom cookies from Live..Bake..Love and the cotton candy meringues.

So here are some of the blog-posts that others posted after the blog:


So now for some tips and tricks for making macarons. I found great amount of help from two blogs, they served as my textbook! So if you are venturing into making macarons surely read these two blogs, here they are:

  • An exhaustive post about macarons by Ms.Humble at Not So Humble Pie
  • A list of great tips for making macarons with do's and dont's by Stella at BraveTart

And finally some tips from this novice baker.:)

  • Measure all the ingredients correctly, buying a scale really made my life easy with this. Also one large egg white when measured equals about 34-36 gms.
  • As Ms.Humble promptly tells, use a steel bowl to beat the meringue in.
  • Since I was baking a lot of batches, I halved the recipe given by Stella (here) so that I could control my portions and the recipe required exactly one egg white! So easy to handle that, imagine taking only half of the egg white! huff..
  • You need to know your oven well, I know this is something you will hear from every other baker, but to start off, raise the lower rack of your oven to a higher level and as Ms.Humble says if they brown from the top, you might need to put an additional sheet on the top.
  • Use a stencil (round cookie cutter) to draw out circles on a parchment, surely makes life easy while piping.
  • I know pretty much everyone says aged whites create a more stable meringue, but I actually got really good results with fresh egg whites so I guess if you beat the meringue right, this issue gets taken care of.
  • I took advice from both the mentioned blogs almost equally and that really helped, so do your home work before you begin the practical. 


Hope this post helps you in your ventures and do let me know if you have doubts about macarons, I am pretty sure I have experienced it by now.
Happy Baking! :)

Saturday, April 21, 2012

Macaron frenzy ends..having cheerios to celebrate.. ;)

I have been busy..crazy busy..with work and with crazy unplanned macaron adventures! Finally after about 6 batches of macarons I can claim that I can make good macarons!! Yippee! :) I set out at the beginning of this month on a macaron learning process, the french ones ..oh yeah! And 15 days later here I am feeling so much confident about it. Here is a sneak preview of it:


I am making them for the upcoming San Diego Bake Sale on April 28th.

So after I reached a point where I felt confident of that the fact that I wont be messing up things at the last minute before the sale, I realized that I really wasn't baking anything else! OMG! So when I found my mind macaron free I baked my heart out.. :D.. first up was a savory dish baked bakarwadi..sadly I cant find which memory chip I put the pictures on, I will find them and post them later on.

But yesterday after going through a periodic pantry clear up process I found that I had few over-ripened bananas and a box full of cheerios cereal! I keep this cereal in my pantry as a backup cereal..yes I am a freak..but it helps to have a couple of choices for cereal. :) So when I realised that this box was moving towards getting too old I had to find alternate options to use it and this experiment just found the right place for it! :) When I googled for cheerios recipes I actually found a lot of recipes on their own website..they looked pretty good and inspired from them I decided to experiment.

We have banana-nut loaf/muffin all too often to feel the need to experiment with it..but I still decided to go ahead and give it another stroke of newness..so here it is..the muffins came out really good..light yet satisfying!


Cheerios banana nut muffins

Ingredients:

    1 1/4 cups Honey Nut Cheerios cereal
  • 1/2 cup all-purpose flour
  • 1/2 cup whole wheat flour
    2 tbsp packed brown sugar
    1/2 teaspoon baking soda
    1/4 teaspoon salt
  • 1 ripe banana
    1/2 cup yogurt
    2 tbsp canola oil
    1/2 teaspoon vanilla
    1 egg white
    1/4 cup chopped walnuts
    1 tsp coarse or granulated sugar 
  • Heat oven to 400°F. Spray bottoms only of 8 regular-size muffin cups with cooking spray, or line with paper baking cups. Spray bottoms only of paper baking cups with cooking spray. In large resealable food-storage plastic bag, coarsely crush cereal with rolling pin or meat mallet.
  • In a bowl, mash the bananas and mix in the yogurt.
  • In another bowl, mix crushed cereal, flour, brown sugar, baking soda and salt. In a mixing bowl, beat oil, vanilla and the egg white until blended. Add the yogurt mixture and mix well. Now add the flour mixture followed by the walnuts. Spoon batter into muffin cups. Sprinkle with coarse sugar.
  • Bake 15 to 18 minutes or until light golden brown. Remove from pan to cooling rack. Serve warm or cool.