Life..a miracle

Life..a miracle

Monday, May 28, 2012

Raspberry semolina muffins..so spring!

I cant believe it has been a month since the bake sale and here I am. The past month has gone by at warp speed! We had my parents visiting us for about 2 weeks which included several family dinners and my brother's graduation! woo-hoo!! Kudos to him for graduating from USC! :)

My baking has been fairly less mainly because we have been eating out way too much..time to dial down the crazy, but I just couldn't miss out on participating in the monthly #baketogether challenge. 
It was the perfect timing since my parents got to experience my baking and this month's recipe for Cornmeal Buttermilk Muffins is pretty much the recipe I use every time I want to make healthy muffins. But instead of using cornmeal I tend to use semolina which gives the same kind of texture but is made from rice/wheat.
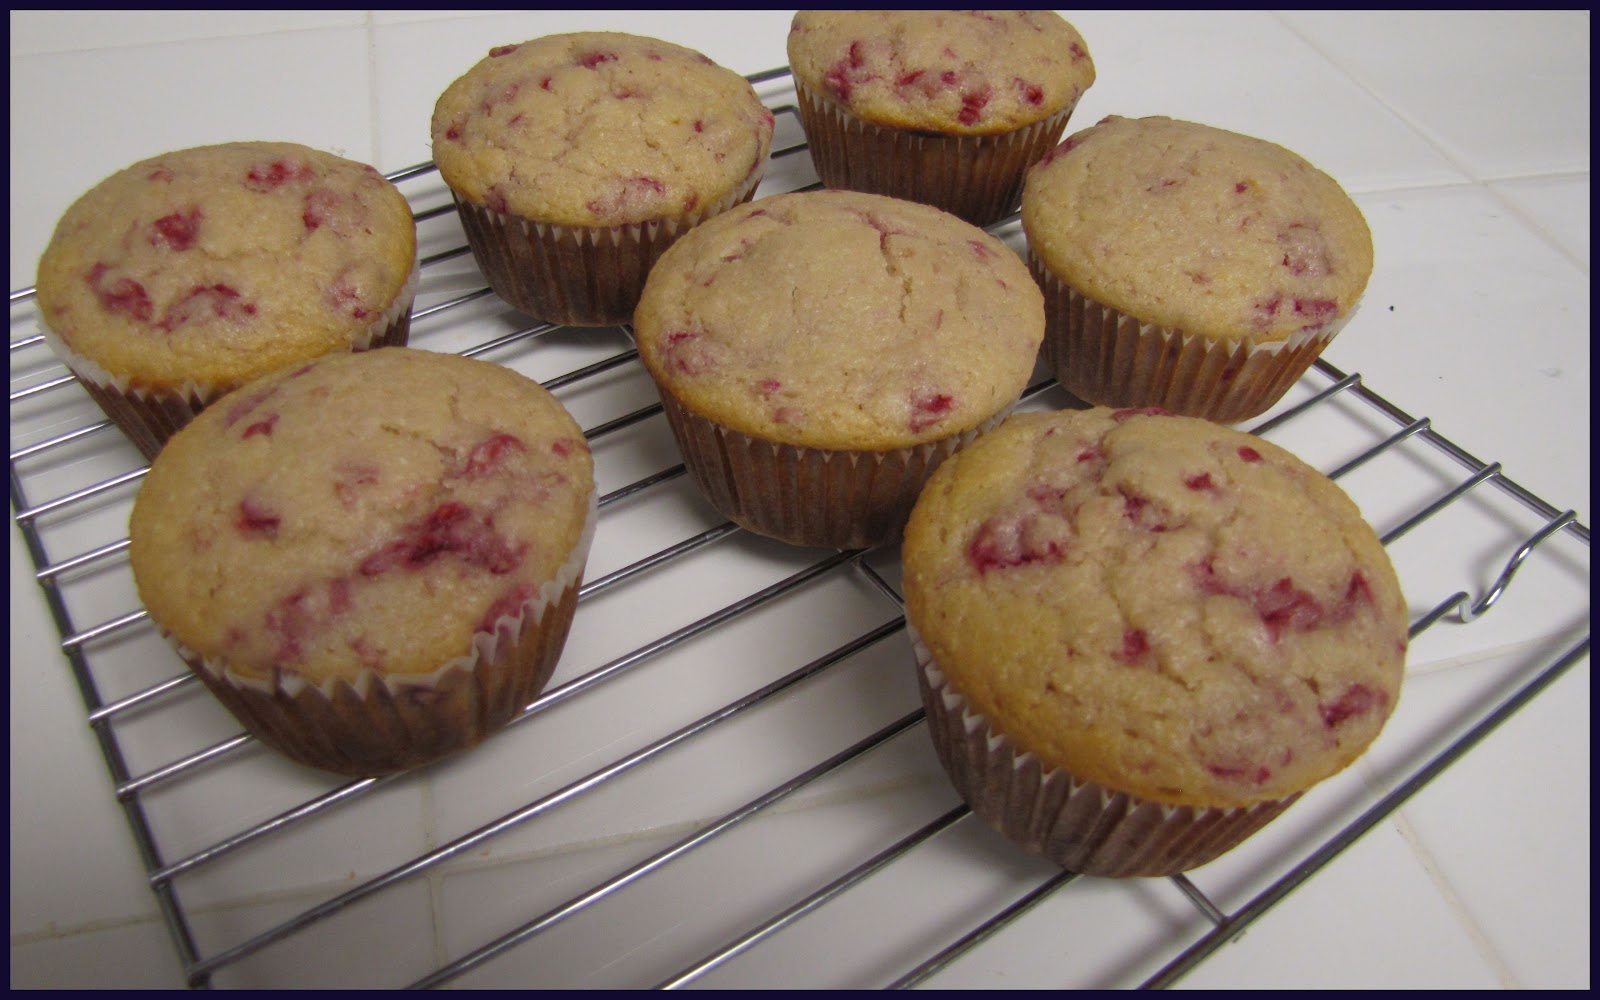

Here are the modifications I made to the basic recipe:
1 cup chopped raspberries
3/4 cup all purpose flour
1/3 cup wheat semolina
3 tbsp sugar
2 tbsp honey
2 tsp baking powder
1/4 tsp table salt
1 tsp lemon zest
1/2 cup yogurt, at room temperature
1 large egg, at room temperature
3 tbsp canola or vegetable oil
1/2 tsp pure vanilla extract

Follow the same directions as mentioned in the original recipe. I only got a couple of snaps of these muffins, with family around these were gone by the next evening. I did pack a couple and gave it to my parents for their trip and felt super glad that I could share my baking joy with them.

Oh and another thing that I am super excited about is my first set of plants! I have planted tomato, chili, basil and cilantro. So far the tomato bears lots of flowers and I hope to get some fruit soon but my chili has given me a good amount of hope, I got my first big chili! Look..


..until next time..have fun!

Wednesday, May 9, 2012

Bake Sale Recap & macaron musings..

I am no expert when it comes to baking, none-the-less macaron making, oh it rhymes.. :P But it has been a really great learning experience for me, not only for learning the right way of whipping up a meringue but rather learning to respect each ingredient. This post is going to be a way for me to document my lessons for macarons and also to help out other bakers who have given up on macaron making. I urge everyone to not give up this magical cookie, just try and stretch your patience and reduce the level of your expectations when you get started with this. But before I go on with my macaron trail, I want to share some photos and some posts from fellow bloggers who participated in the sale.

I of course made macarons in two flavors: Lemon macaron with mango butter & Raspberry macaron with dark chocolate ganache. umm..ummm! I went through a turmoil in terms of deciding what I should pack them in. I didn't wanna spend crazy $$ on just boxes but putting them in a small treat bag  felt like laziness and made me super scared that they would be crushed by someone. So inspired by a post by Bakerella right here, I decided to make my very own box template and the end product came out to be something so cute! :) 


As usual, keeping the boxes for the last minute only made my time management crash down, but with help from the lovely hubby I finally managed to get my stuff to the bake sale! It was an amazing experience! Its a great thrill to see people's reaction right then and there and understand how people look at food. I got some really good reviews for the macarons, and was elated when I got some mentions in blog posts too. :)

I also got to meet some really great people, who share the same passion of food as me. In the hurry to get to the sale, I forgot my camera, and so now I can only provide you with some links to posts from other bloggers. While selling macs, I also went around and bought some goodies! I bought the Orange Chocolate Tart from Ann, the cinnamon and cardamom cookies from Live..Bake..Love and the cotton candy meringues.

So here are some of the blog-posts that others posted after the blog:


So now for some tips and tricks for making macarons. I found great amount of help from two blogs, they served as my textbook! So if you are venturing into making macarons surely read these two blogs, here they are:

  • An exhaustive post about macarons by Ms.Humble at Not So Humble Pie
  • A list of great tips for making macarons with do's and dont's by Stella at BraveTart

And finally some tips from this novice baker.:)

  • Measure all the ingredients correctly, buying a scale really made my life easy with this. Also one large egg white when measured equals about 34-36 gms.
  • As Ms.Humble promptly tells, use a steel bowl to beat the meringue in.
  • Since I was baking a lot of batches, I halved the recipe given by Stella (here) so that I could control my portions and the recipe required exactly one egg white! So easy to handle that, imagine taking only half of the egg white! huff..
  • You need to know your oven well, I know this is something you will hear from every other baker, but to start off, raise the lower rack of your oven to a higher level and as Ms.Humble says if they brown from the top, you might need to put an additional sheet on the top.
  • Use a stencil (round cookie cutter) to draw out circles on a parchment, surely makes life easy while piping.
  • I know pretty much everyone says aged whites create a more stable meringue, but I actually got really good results with fresh egg whites so I guess if you beat the meringue right, this issue gets taken care of.
  • I took advice from both the mentioned blogs almost equally and that really helped, so do your home work before you begin the practical. 


Hope this post helps you in your ventures and do let me know if you have doubts about macarons, I am pretty sure I have experienced it by now.
Happy Baking! :)

Saturday, April 21, 2012

Macaron frenzy ends..having cheerios to celebrate.. ;)

I have been busy..crazy busy..with work and with crazy unplanned macaron adventures! Finally after about 6 batches of macarons I can claim that I can make good macarons!! Yippee! :) I set out at the beginning of this month on a macaron learning process, the french ones ..oh yeah! And 15 days later here I am feeling so much confident about it. Here is a sneak preview of it:


I am making them for the upcoming San Diego Bake Sale on April 28th.

So after I reached a point where I felt confident of that the fact that I wont be messing up things at the last minute before the sale, I realized that I really wasn't baking anything else! OMG! So when I found my mind macaron free I baked my heart out.. :D.. first up was a savory dish baked bakarwadi..sadly I cant find which memory chip I put the pictures on, I will find them and post them later on.

But yesterday after going through a periodic pantry clear up process I found that I had few over-ripened bananas and a box full of cheerios cereal! I keep this cereal in my pantry as a backup cereal..yes I am a freak..but it helps to have a couple of choices for cereal. :) So when I realised that this box was moving towards getting too old I had to find alternate options to use it and this experiment just found the right place for it! :) When I googled for cheerios recipes I actually found a lot of recipes on their own website..they looked pretty good and inspired from them I decided to experiment.

We have banana-nut loaf/muffin all too often to feel the need to experiment with it..but I still decided to go ahead and give it another stroke of newness..so here it is..the muffins came out really good..light yet satisfying!


Cheerios banana nut muffins

Ingredients:

    1 1/4 cups Honey Nut Cheerios cereal
  • 1/2 cup all-purpose flour
  • 1/2 cup whole wheat flour
    2 tbsp packed brown sugar
    1/2 teaspoon baking soda
    1/4 teaspoon salt
  • 1 ripe banana
    1/2 cup yogurt
    2 tbsp canola oil
    1/2 teaspoon vanilla
    1 egg white
    1/4 cup chopped walnuts
    1 tsp coarse or granulated sugar 
  • Heat oven to 400°F. Spray bottoms only of 8 regular-size muffin cups with cooking spray, or line with paper baking cups. Spray bottoms only of paper baking cups with cooking spray. In large resealable food-storage plastic bag, coarsely crush cereal with rolling pin or meat mallet.
  • In a bowl, mash the bananas and mix in the yogurt.
  • In another bowl, mix crushed cereal, flour, brown sugar, baking soda and salt. In a mixing bowl, beat oil, vanilla and the egg white until blended. Add the yogurt mixture and mix well. Now add the flour mixture followed by the walnuts. Spoon batter into muffin cups. Sprinkle with coarse sugar.
  • Bake 15 to 18 minutes or until light golden brown. Remove from pan to cooling rack. Serve warm or cool.

Wednesday, April 4, 2012

Snap n its spring!

The spring has officially started and its going to be more exciting than ever!
I have been missing for the past month or so..but no I did not forget my blog and neither was I on a break from baking. If anything else I am baking way more than usual but its mainly experimentation. I was postponing to post anything because all my baked goods are currently meant to be for the upcoming Bake Sale in San Diego. Today's recipe is a contender for the bake sale, just that it has gone one rank down in my list. :P


I have had this recipe bookmarked for almost 6 months now. Initially I didn't pursue it because it had ingredients which I usually don't find in my pantry but with my hubby's love for gingersnaps I finally got to this recipe. Its actually a recipe tried and tested by the very famous David Lebovitz. You can find the original recipe here. After I saw the recipe for the first time I was really curious! Fat-free gingersnaps, is that even possible? And to my finding yes it is!

I used the recipe as is, just switched half of the flour with whole wheat flour and used light brown sugar since I had it in my pantry. I did make the candied ginger at home and it was way easier than I thought it would be. I used the recipe suggested by David Lebovitz again and you can find it here.


Now for the fun news. When I moved to San Diego last year, I heard about the bake sale from my friend, but I wasn't really setup to do anything..much rather bake! So it was something I was looking forward to this year. And finally it is this very month that San Diego will have its blogger's bake sale! If you are in the San Diego area then do drop by and enjoy the goodies and have some fun! You could also donate to the charity and join in! More details available here: http://sdbloggersbake.wordpress.com/. Hope to see you all there!

Friday, March 9, 2012

Time to celebrate!

I am feeling so good about writing this post. Its my 25th post! yay! The first recipe is quiet special, especially because I learnt this one from my mother-in-law! I spent most of January with my in-laws and I got to enjoy a new cuisine which wasn't very different than the food I grew up eating but it was more rather an adaptation of a cuisine to locally available ingredients. To top that my mother-in-law is an excellent cook who also enjoys experimenting with recipes so I have been lucky to have her around me! :) I am in food heaven! :D

My in-laws come from the central region of India which is majorly dry and mostly warm. The cuisine is quite rich and bursting with spices. I can't begin to list and describe all the different dishes I tried out, I could go on for days! So after a few weeks of being back in the US, I of course started to reminisce about all the yummy things I had and to end that craving I was set on recreating some of them.

The first one that came to my mind was the Baingan Bharta (Eggplant curry). It was one friday night when I realized that I had all the required ingredients to make it and decided that my weekend would start with a delicious dinner! I have made this dish quite frequently but not in this way! So here goes:

Baingan Bharta (Eggplant curry)

Ingredients:
1 Large eggplant ( the big sized ones usually used in Italian dishes too)
2-3 medium spring onions chopped
2-3 green chillies split vertically
2-3 cloves garlic chopped
curry leaves
1 tsp mustard seeds
1 tbsp vegetable / canola / EVOO oil
1/2 tsp asafoetida (optional)
1.5 tsp coriander-cumin powder
1 tbsp lime juice
salt to taste
cilantro for garnish

  • Roast the eggplant in the oven or on the gas flame. Its done when the skin starts peeling off. Once roasted, peel the skin off the eggplant, separate off the flesh from the head of the eggplant and mash it well.
  • Heat some oil in a pan. Add in the mustard seeds and curry leaves. Once the mustard seeds splutter, add in the asafoetida followed by the chillies and garlic. Once the chillies are almost fried, add the spring onions and let them cook well. 
  • When the onions become transparent, add in the eggplant and mix well. Add in the lime juice, coriander-cumin powder and adjust the salt to your taste. Let the whole mixture come together, it becomes like a slushy mass. Season with cilantro. Enjoy with hot chapatis!
We had it with some home-made garlic chutney, sliced raddishes and chapatis! yumm!


Now to celebrate my 25th post and the International Women's day, here is the recipe of the roasted plum and peach ice-cream I tried out, inspired from this recipe posted by Deeba on her lovely blog! I of course tried to give it a healthy twist.

Roasted plum and peach ice-cream (low-fat) (eggless)

Ingredients:
4  plums
2 peaches
1.5 tbsp brown sugar
1 tsp vanilla extract
1/4 cup roasted almonds coarsely chopped
250 gms low-fat greek yogurt
200 ml half-n-half
4 tbsp sugar
6-8 tbsp honey - adjust the honey based on the sweetness that you like

  • Preheat the oven to 375 F.
  • Combine sugar and vanilla. Arrange the peaches & plums skin side down on a baking tray and sprinkle with the vanilla/ sugar mixture. Grill in the oven for 20 minutes or until the top of the peaches appear caramelized.
  • Remove the skin from the peaches as soon as it is cool enough to do so. Puree the peaches and any juices in the baking tray in a blender.
  • In a separate bowl combine the half-n-half, greek yogurt and peach/plum puree. Adjust sugar as required. Churn in your ice cream maker according to the manufacturer’s directions. About 5 minutes before switching off the machine, add in the chopped nuts. Refrigerate for about 2 hours and serve! 

Hope all you lovely ladies out there had a great Women's day! Also here is to hoping that I get to write many more blogs!